Getting Started
Table of Contents
Running with Docker
Docker images are offered on the ElasticHQ Dockerhub.
Run with:
docker run -p 5000:5000 elastichq/elasticsearch-hq
Access HQ with: http://localhost:5000
When starting with Docker, see Environment Variables for passing startup args. Environment variables are passed to docker using the -e flag.
ie. -e HQ_DEFAULT_URL='http://aa.com:1212'
Note
The latest tag deploys the latest stable release. Where develop is the latest unstable working branch.
Install from Source
Requirements
- Python 3.4+
- Elasticsearch. Supported versions: 2.x, 5.x, 6.x, 7.x
Install ElasticHQ
- Download or clone the repository https://github.com/ElasticHQ/elasticsearch-HQ
- Navigate to the root of the repository:
pip install -r requirements.txt - Start the server:
python3 application.py - Point your browser to: http://localhost:5000
Note
Alternatively, you can start the server with python manage.py runserver
Pre-Releases
Pre-release versions are made available as branches in the github repository. We use GitFlow methodology and adhere to semantic versioning.
Our branching organization is as follows:
master: contains Latest Stable release.develop: contains latest features. Not stable.#.#.#RC-#: Release candidates are pre-release versions. Not stable.
OpenShift
Information for running on openshift, can be found here: ElasticHQ OpenShift
Initial Login
ElasticHQ is accessible, in default configuration under http://localhost:5000
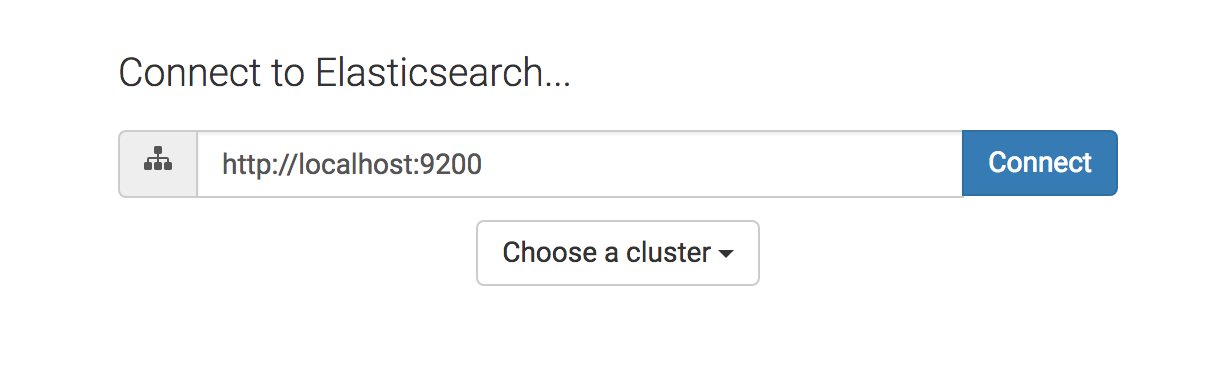
The input field takes a url in the form of: http://DOMAIN:PORT
httporhttpsare accepted schemes- For Basic Auth, use the format:
http://USERNAME:PASSWORD@DOMAIN:PORT
Configuration
Command line Parameters
The application.py start script takes parameters passed in as arguments from the command line:
Arg Default Value Definition --host127.0.0.1 Host the HQ server should be reachable on. --port5000 Port to reach HQ server. --debugFalse If True, exposes debug data to UI and causes reload on code changes. --urlhttp://localhost:9200Default URL displayed on the initial connection screen. --enable-sslFalse If flag is passed, assumes ssl cert will be used. --ca-certs/path/to/your/ca.crt Path to your CA Certificate. Required if enable-ssl is passed. --verify_certsTrue Whether HQ should attempt to validate certs. Set to False for self-signed certs.
Example:
python -m application
--enable-ssl
--ca-certs /path/to/your/ca.crt
Environment Variables
Arg Default Value Definition HQ_DEFAULT_URLhttp://localhost:9200Default URL displayed on the initial connection screen. HQ_ENABLE_SSLFalse If flag is passed, assumes ssl cert will be used. HQ_CA_CERTS/path/to/your/ca.crt Path to your CA Certificate. Required if enable-ssl is passed. HQ_VERIFY_CERTSTrue Whether HQ should attempt to validate certs. Set to False for self-signed certs. HQ_DEBUGFalse If True, enables debug level on logging.
Example:
docker run -p 5000:5000 elastichq/elasticsearch-hq
-e HQ_DEFAULT_URL='http://aa.com:1212'
-e HQ_ENABLE_SSL=False
Logging
ElasticHQ logs out to console AND file by default. The application log file is located at the root of the HQ path and is called application.log.
Advanced users that want to have control over the logging output, can adjust it by altering the configuration file kept under elastichq/config/logger.json.
Docker users will find the logfile location under /src/application.log
Connecting with SSL
Thanks to a community contribution, SSL Cert support has been added: SSL Support.
Enable SSL Cert support by starting HQ as so:
python -m application --enable-ssl --ca-certs /path/to/your/ca.crt
Note
When using self-signed certs, you must disable certificate verification. See: Command line Parameters or Environment Variables
Database
ElasticHQ ships with SQLLite integration to store clusters you have connected to and other meta information. This database is kept under the root directory as elastichq.db.
Note
In the event you want to start with a clean slate, simply delete the elastichq.db file. ElasticHQ will recreate it at next startup.
External Configuration
External configuration files are supported for those wanting to preserve their user-specified settings between upgrades.
On startup, HQ checks the following locations for a file named settings.json:
- /etc/elastic-hq/settings.json
- ~/settings.json
- CURRENT WORKING DIRECTORY +
/settings.json - CURRENT WORKING DIRECTORY +
/elastichq/settings.json - CURRENT WORKING DIRECTORY +
/config/settings.json
Current supported parameters are:
Key Definition SQLALCHEMY_DATABASE_URILocation and Name of ElasticHQ database file.
The settings file should be in standard JSON:
{
  "SQLALCHEMY_DATABASE_URI" :  "sqlite:////SOME/PATH/TO/DB_NAME.db"
}
Upgrading
We adhere to semantic versioning, so as long as the Major version hasn’t changed, you can expect everything to work well enough. ;-)
Latest Version
ElasticHQ checks against the Elastichq.org website, to retrieve the latest stable version number. You can see the check in the footer:
Versions Match:

Time to Upgrade:

Upgrading Minor and Patch versions
- To upgrade, simply download or clone the repository master branch.
- Upgrade the database:
python manage.py db upgrade - (Re)Start the server:
python application.py - Point your browser to: http://localhost:5000
Running in Production
We advise that under any considerable usage/load, this application should be run with a multithreaded server. The current flask implementation by itself should not be run in production without this, as it is a single-threaded process.
We recommend running this WSGI application with gunicorn. The Docker container available on DockerHub is pre-configured to run with gunicorn, and is preferred. See the Running with Docker
If you wish to run without a container, install gunicorn by either commenting out the line in the requirements.txt file or simply running pip install gunicorn
In console, run gunicorn with:
gunicorn -w 1 -b :5000 --worker-class eventlet application:application
The application will be accessible under http://127.0.0.1:5000
Read the Gunicorn Docs for further command line options.
Note
For the Metrics section to broadcast via websocket, you must have gunicorn set to 1 worker.
Troubleshooting
Diagnosing connection errors
Failure in connecting initially to an Elasticsearch cluster, can happen for several reason:
- Basic Authentication: If you did not enter in the security credentials in the connection URL, HQ will fail to connect. The proper format is
http://USERNAME:PASSWORD@DOMAIN:PORT - X-Pack License Expiration: X-Pack comes with a #-day license that will silently expire. Expiration of the license may cause connectivity issues, so it is advised to either purchase an X-Pack license or uninstall X-Pack.
- No Route to ES cluster: Confirm that the server running HQ has access to ES via network. You can do this by calling ES from within a terminal window on the HQ server, with a
curl -XGET http://DOMAIN:PORT. - CERTIFICATE_VERIFY_FAILED: If you see this error in the log, you are most likely using a self-signed cert and did not set validate_certs variable to false. See: Command line Parameters or Environment Variables
X-Pack Integration
X-Pack is configured with authentication. To connect, you must pass along the username and password in the connection URL
using the format http://USERNAME:PASSWORD@DOMAIN:PORT
ElasticHQ will store the username and password in the database, so future connectivity is not an issue.
Warning
We do realize that the username and passwords are stored plain text in the ElasticHQ DB, but this is a necessary evil that allows for easy reconnection.
Viewing Logs
In the base installation, the logs are available under the /install/path/application.log.
For docker images, the application logging can be found under /src/application.log.
SSL Cert not working
NOTE: Your CA file must be the same signer of your Elasticsearch node, for HQ to connect as a trusted source.
Verify that the certificate works by connecting directly from the HQ instance to the ES node in question, using the cert:
curl -u admin:password --ca-certs /path/to/ca.crt https://localhost:9200/_cluster/settings?pretty
Preserving Database across Docker container restarts
The following code block originated as an issue (https://github.com/ElasticHQ/elasticsearch-HQ/issues/409) for those wanting to preserve the HQ SQLLite DB between container restarts.
docker run --detach
--restart=always
--net host
--volume elastichq:/src/db
--name elastichq
elastichq/elasticsearch-hq
sh -x -c 'sed -i -r -e "s/_sqlalchemy_database_uri =.*/_sqlalchemy_database_uri = "sqlite:///" + os.path.join(BASEPATH, "db" , "elastichq.db")/" /src/elastichq/config/settings.py && exec supervisord -c /etc/supervisor/supervisord.conf'
License
Copyright 2013-2018 Roy Russo and Authors
Licensed under the Apache License, Version 2.0 (the “License”); you may not use this file except in compliance with the License. You may obtain a copy of the License at
Unless required by applicable law or agreed to in writing, software distributed under the License is distributed on an “AS IS” BASIS, WITHOUT WARRANTIES OR CONDITIONS OF ANY KIND, either express or implied. See the License for the specific language governing permissions and limitations under the License.